
The efficient separation of embroidery floss is important to achieve smooth threads and flawless designs of your projects.
If you are making 3 stands for punching or working with a whole skein, you may have a reliable technique of saving time and increasing the process of crafting.
Irrespective of splitting floss in small pieces or use of feet at a time can help in managing the complete skein at fast.
Using tools like a fishing swivel can simplify the process and reduce the need for frequent needle threading, which is often the least enjoyable part for many crafters.
Therefore, focus on floss preparation and efficient floss splitting can help you finding an easier way of creating beautiful embroidery projects.
Proper floss management and crafting tools make the embroidery technique seamless and help maintain consistency with your embroidery supplies.
Strand Of Embroidery Floss To Be Used
When working with embroidery floss, selecting the right strands is key to achieving beautiful stitches.
Many people prefer using 3 strands for detailed work, but 6 strands provide a fuller, bolder look, especially when you don’t need to split the floss.
If fine detail is required, 1 strand can work wonders, though it takes more effort to fill the area, giving you greater control over the piece.
Experimenting with 2, 4, or even 5 strands can offer unique textures, and adjusting the thickness allows you to tailor the appearance of your project.
Personally, I’ve found that separated strands make the stitches look fluffier and more vibrant, which enhances the overall feel of the work.
Trying different strand counts not only improves your technique but also helps you see what combination works best for each design, whether it’s filling larger spaces or perfecting finer details.
Need Of Supplies To Separate Floss
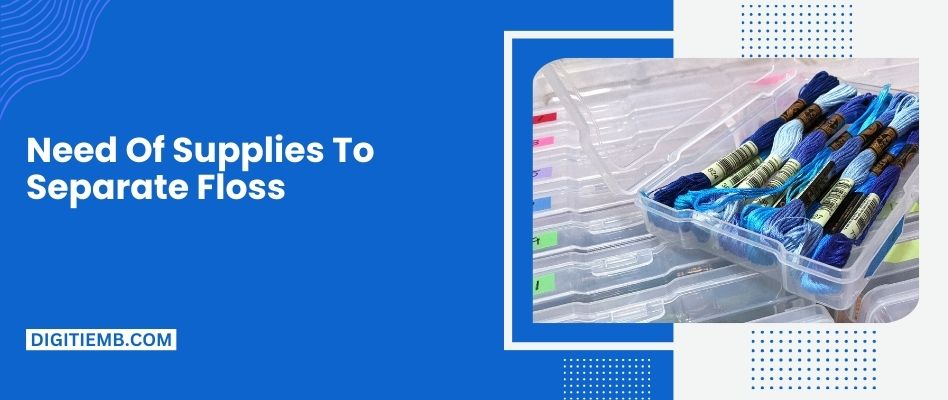
Separating embroidery floss is a simplified process involving a few supplies beginning with a fishing swivel that is effective to keep string untangled as you work.
A sturdy piece of string tied to one end of the swivel and fashioned into a loop at the other makes setup easy.
You can attach the loop to a door knob or even a knob on your furniture making it a secure grip of the floss.
The supplies can help you find the finished aisle of sporting goods stores or places like Wal-Mart which is a convenient and inexpensive solution.
Raiding an old tackle box at home lets you produce an amazing result while securing a trip to stores and to ensure your need for smooth and efficient separation of floss.
Process Of Separating The Skein Of Embroidery Floss
Working with DMC 6 strands begins with tidying one end of embroidery floss in a safe way while fishing the swivel to ensure it unwinds smoothly.
To lay the floss in a straight line across the floor lets you prevent it from getting tangled. Dividing the strand equally with the division of three strands can make sure to begin the separation from 6-8 inches away from the tied end.
As you pull the sections apart, walk towards the swivel, allowing it to spin quickly and remove any twists. Once you reach the swivel, either untie the knot or cut the floss free.
When you put the sections apart, you may walk towards the swivel letting you to spin fast and remove any twist.
Right after the swivel, you can unite the knot or cut the floss free.
After separation, wind the strands onto a bobbin or spool, making it ready for punching and saving time while reducing frustration during your needlework.
Conclusion
By following this simple process to separate embroidery floss, you’ll save valuable time and reduce frustration during your stitching projects.
With neatly separated strands, you can enjoy a smoother, more efficient embroidery experience, ensuring your stitches are perfect every time.
Q1: What is the best way to separate embroidery floss?
The best way is to unwind the floss, lay it flat, and gently separate it into equal bunches about 6-8 inches from the end, making sure not to separate it right at the end to avoid tangling.
Q2: How do I prevent embroidery floss from tangling while separating it?
To prevent tangling, start separating the floss a few inches from the end, and avoid pulling too hard.
The fishing swivel method helps untwist the floss as you separate it.
Q3: Can I use any brand of embroidery floss for this process?
Yes, you can use any brand, but DMC 6-strand embroidery floss is commonly used and works well for separating into strands.
Q4: How many strands should I separate for each bunch?
For an even separation, divide the floss into two equal bunches, each containing 3 strands.
Q5: What should I do if the floss becomes too twisted?
If the floss becomes twisted, walk towards the swivel, allowing it to spin and untwist the floss, making it easier to separate.
Q6: How do I store the separated floss?
Once separated, you can wind the floss onto a bobbin or spool to keep it neat and organized for future use.
Q7: Is the process of separating floss time-consuming?
While it may take a few minutes, once you get the hang of it, this process can save you time and frustration in the long run, especially during large stitching projects.